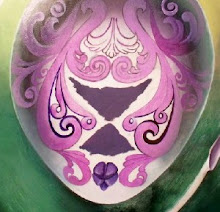
Good evening. I've reached the point where I'm ready to start painting a new painting (the drawing has taken a while, but now that it's done...) Since a large portion of this piece is going to be painted using an airbrush, it seemd like the perfect time for an Airbrush Tutorial. If any of you have used an airbrush before, you already know some (most?) of this stuff, but I'm going to start at the every beginning, so those of who who haven't ever picked up an airbrush, can follow along.
Feel free to print this out, and keep it handy for future reference!
Airbrushing 101
Choosing an Airbrush
There are two basic airbrush types: single-action, and double-action.
If you are planning to do anything more complex than spraying flat colour, or basic stencilling, buy a double-action airbrush. The Paasche "V", Bsdger 150, or Iwata HP-SB or HP-B are good-quality, fine-detail, "illustration" or "fine art" airbrushes. They cover well for small-to-medium sized work.
For T-shirt and other fabric airbrushing, larger work (murals, large-scale paintings, or commercial airbrushed illustration on car hoods, or the sides of trucks) the Badger Crescendo, Paasche 150, or Iwata HP-C are good choices. (For actually painting cars, trucks, or boats, you'll need commercial spray equipment, which I won't be discussing here.)
Expect to spend around $130.00 to $150.00 for a good double-action airbrush.
Air Source
Airbrushes are powered by compressed air. Most airbrush artists use air compressors, though some prefer commercial gas tanks filled with C02 or nitrogen. Airbrush companies will charge you a small fortune for a "quiet" compressor, but unless you really need a small, quiet air source, you're better off with a compressor from the local hardware store. Get one with at least 1/2 horsepower, and a built-in tank. If the unit has a tank, it should come with a regulator with two gauges. One guage will show the pressure in your compressor's tank; the other will show your "working pressure"--the pressure going out of the tank to your airbrush.
For illustration work, you're probably going to paint using between 15 and 40 psi (pounds per square inch) of pressure. For T-shirts, or other projects where thicker fluids are sprayed, you'll probably be using 45 to 80 (or more) psi. Make sure your compressor (and your airbrush) can handle the pressure level you need for the type of paint you're working with.
Paint
Any paint that can be thinned to the consistency of milk, can be sprayed through an airbrush. There is also a large variety of ready-made airbrush paints (Createx, Com-Art, Badger Air-Opaque, Golden High-Flow, Liquitex Acrylic Ink, Dr. Ph. Martin's, etc.) that are fluid enough to go right into your airbrush, straight off the shelf. Except for the Ph. Martin's (which is water-based) the others I've listed are all acrylic paints that can be thinned with water, or with Golden or Liquitex Airbrush Medium.
Many other types of paint (enamels, lacquers, etc.) can also be sprayed through an airbrush. Many of these types of paint are highly toxic, especially since, when airbrushing, you are breathing them into your lungs!)
Wear a face mask or respirator when airbrushing, even if you are using paints labelled "non-toxic"! Paints are tested for toxicity by ingestion, and paints that may be (more or less) "safe" (non-toxic) to eat, can still be bad news when very fine droplets of them get into your lungs. (Your stomach has an "exit"; your lungs do not!)
Cleaning
Airbrushes have a reputation for being tempermental, requiring time-consuming, and constant cleaning. This can be true, though there are ways to avoid having to take your airbrush apart and scrub each part clean with tiny brushes after each use.
The answer is to run cleaner through your airbrush...lots of cleaner, all the time.
BEFORE you start airbrushing, fill the airbrush's colour cup with cleaner, and spray it through the airbrush. If there is any problem with your airbrush, you'll know it right away during this step. Airbrush cleaner is more fluid than even the thinnest airbrush paint, and if your airbrush won't spray cleaner properly, there's no way it's going to spray paint. Listen for sputtering or spitting, or intermittent spraying, as a clue to problems--except when the cup is just about dry; airbrushes always sputter at this point.
If everything is OK, run a SECOND colour-cup full of cleaner through, and you're ready to put paint in the cup, and start airbrushing.
WHILE painting, run a colour-cup full of cleaner through your airbrush after every second refill of the same colour, and between every colour change. (Also, between colour changes, swab a Q-tip around the inside of the cup, so that the residue of the colour you just used won't "contaminate" the new colour you're about to put in.)
AFTER Airbrushing, run THREE MORE colour cups full of cleaner through your airbrush. Then, loosen the nut which holds the needle in, pull the needle out, wipe if off (with a rag moistened with cleaner), replace the needle, and run ONE MORE colour cup of cleaner through.
Total of FOUR colour-cups of cleaner, any time you're going to stop airbrushing for more than fifteen minutes!
You're done; your airbrush is clean, and didn't require disassembly.
Cleaner
One reason many airbrushers don't keep their airbrushes clean enough to avoid having to take it apart and clean it piece by piece, is that it can be expensive to run commercial cleaners through their airbrushes as I've recommended, above. The solution is to MAKE YOUR OWN airbrush cleaner!
I've used this for more than 20 years, and it works great. Mix 1 part ammonia with three parts distilled water, and for about two bucks or so, you have 5 quarts of a really good airbrush cleaner!
For lacquers, enamels, automotive paints, sign painters paint, or other commercial or industrial paints, make sure you have the right cleaner for removing the type of paint you're using, on hand and ready to use before you start airbrushing. Some paints (such as acrylics) dry very quickly, and you don't want your airbrush to be full of drying enamel paint, while you run to the store for a can of thinner!
There you go, the basics of what you need to know before you start airbrushing.
It's late, and I'm calling it a night. The next post(s) will cover the actual steps involved as I work on a painting, with photos. Lots of photos. I hope you enjoy it.
Tell your friends!
Good night...
An artist's journey...
All content copyright 2011, 2012, and 2013 by Keith Russell.
Any copying, downloading, etc. of any portion of the contents of this blog--including photographs and artwork--without written permission from Keith Russell,
is not nice...and not legal!
Any copying, downloading, etc. of any portion of the contents of this blog--including photographs and artwork--without written permission from Keith Russell,
is not nice...and not legal!
No comments:
Post a Comment